submit a ticket
submit
free hosting
request
Home > Regular flash template help > How to Replace Images in a Flash Template using Adobe Flash ?
How to Replace Images in a Flash Template using Adobe Flash ?
1. To replace graphics/images/photos in your Existing Flash template with your own images, first prepare your new image in an image editing software and save it as a jpg, a png, or a gif. (It's helpful if your new image is fairly close to the same dimensions as the template image you are going to replace.)2. Then, launch Flash and open the .fla file from your template's fla files folder.
3. From Flash's top menu, choose File > Import > Import to Library. In the Import window that opens, navigate to where you saved your new image and double-click on its name. The Import window will close, and your new image is now in the Flash movie's Library. (You may open the Library panel with the F11 key on your keyboard, or go to Window > Library from Flash's top menu.)
4. Next, drag the Playhead (small pink rectangle at the top of the Timeline) until you see the image you want to replace on the stage.
Tip: Make sure the image's Layer is not locked. If a Layer is locked, click once on its padlock icon to unlock it.

5. Click on the image with the black arrow tool to select it. The image will have a thin blue border when it is selected.
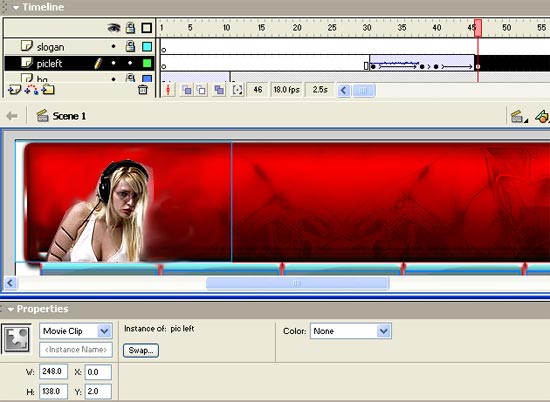
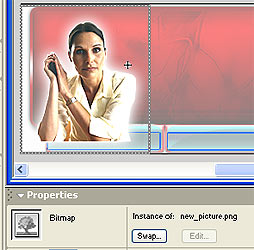
6. Then, double-click on the image on the stage. If the Properties panel changes to show that you are now looking at a Graphic symbol of the image, like this... ----> ... you will need to double-click again on the image, and keep double-clicking, until the Properties panel shows that you are looking at the Bitmap of the image, like this ---->
 |  |
7. Then, click the Swap button in the Properties panel, and in the Swap window that opens, locate and select your own new image that you imported into the Library.
8. Click the OK button. The Swap window will close and the image on the stage will be your new image. Use the arrow keys on your keyboard to nudge the image into place if necessary.
Flash Editing help
- Getting started with a flash template ?
- How to make flash header links link to html pages ?
- How to create a mail link in flash ?
- How to insert background music in flash ?
- How to create additional buttons in flash ?
- How to create a new link in flash ?
- How to create a scrollbar in flash ?
- Flash/php contact form installation ?
- How to replace images in flash ?
- How to change the text in a flash ?
- How to insert a sound effect in flash ?
- How to insert text in a flash movie ?
- How to exchange images in flash ?
- How to insert a new image in flash ?
- How to add a new page to a existing flash site ?